News
BN Beauty: Why Buy It When You Can Make It? Check Out this Recipe For Homemade Facials
 Sometimes beauty needs money, and in a bid to get the best quality products we end up spending a huge chunk of it on facial treatments that could probably be whipped up in our kitchen. A good facial peel from a SPA costs about N10, 000, and not everybody including yours truly, can spend that amount frequently. However, we all still want our skin to look smoother, finer and better.
A facial peel also known as chemical peel enhances the appearance of the skin in a very good way. A chemical solution is applied on the skin, which turns the wrinkled or problematic section of the skin into blisters, and this makes it very easy for the layer to be peeled off without scarring the face. The essence of this chemical peel is to make the skin finer and better in appearance.
As I often say “there is always a natural solution to every beauty challenge”. Keep reading as I show you how you can make a natural home made facial peel that is inexpensive, safe and of course works. Once you’re done with this natural facial peel, your skin will look so good (you may not recognize yourself, in a ‘good way’)
What you need
Even though there are a lot of ingredients that can be used to make home made facial masks or peels as you may find on other sites, but this one will only focus on using three.
– Fresh Pineapple (Medium Size)
– Fresh Papaya (PawPaw) (Medium Size)
– Dark Organic Honey (1 Tablespoon)
Wondering why we are using these particular ingredients? Well Pineapple and Papaya contain natural enzymes and alpha-hydroxyl acids that eliminate dead skin cells and the honey soothes and revitalises the skin. Here’s how.
Procedure
Step 1: Blend the Pineapple and the Papaya into a fine paste. It is advisable to use a blender to this effect to get a smooth paste.
Step 2: After the paste has been made, add a tablespoon of organic honey to the mixture.
Step 3: Wash you face with your preferred facial wash, making sure your face is clean and pat dry with a paper towel (Or use a lint-less towel to avoid irritation when the paste is applied)
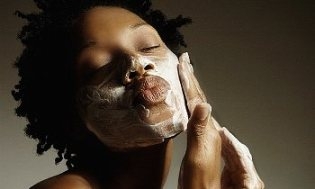
Step 4: Use your ring finger to apply the paste to your face and neck. While doing this please avoid your eye area or other parts of your ski you know t be sensitive.
Step 5: Lie down on your back, relax and leave the mask on for 20- 25 minutes. If you have sensitive skin reduce the time to around 10 minutes.
Step 6: After exceeding the allotted time, wash the mask off with warm water.
Step 7: After your face is completely dry, use your preferred toner and moisturiser all over the treated area. After this has been done it is advisable to sprinkle some cold water as well; washing your face with warm water opens up your pores allowing the skin soak up the ingredients and moisturiser. Sprinkling cold water afterwards closes the pores back up securing the treatment under the skin.
And that’s your natural beauty tip! Remember that there are other ingredients and procedures that can be sued to create your home made facial mask. If you have your other treatments please share with us. Till next time, remain beautiful. 😉
Photo Credit: Blackdoctor.org